在 Unity 中使用 TorchSharp 和 RLMatrix
所以您真的想在 Unity 2025 中使用 TorchSharp?
TorchSharp 的貢獻者們可能能比我更好地解釋這一點 - 但基本上安裝步驟包括下載 libtorch DLL(超過 1GB)並安裝/引用它們。
這在較新的 .NET Core 版本中是自動完成的,但由於 Unity 尚未轉移到 CoreCLR,我們必須手動完成許多步驟 - 包括 NuGet 安裝。 我之前編寫過一個關於在 Unity 中有效安裝 NuGet 包的指南;這個簡短的指南只是透過手動複製 DLL 來擴展它。
- 在 Unity 專案中創建所需的資料夾:
Assets/Plugins/Windows/x86_64- 使用 NuGet 安裝 RLMatrix
首先,從 NuGet 網站 下載 nuget.exe 並保存到 C:\nuget.exe。如果您將其保存在其他位置,確保更新下面腳本中的路徑。
將以下 PowerShell 腳本保存為 install-rlmatrix.ps1 到您的 Unity 專案的根目錄:
$packageName = "RLMatrix"$packageVersion = "0.4.0"$netTarget = "netstandard2.0"$tempDir = ".\Temp"$dllDir = ".\Assets\Plugins"$nugetPath = "C:\nuget.exe"if (!(Test-Path $nugetPath)) { Write-Error "NuGet.exe not found at $nugetPath. Please ensure it's installed there or update the path." exit 1}if (!(Test-Path $tempDir)) { New-Item -ItemType "directory" -Path $tempDir}& $nugetPath install $packageName -Version $packageVersion -OutputDirectory $tempDirif (!(Test-Path $dllDir)) { New-Item -ItemType "directory" -Path $dllDir}Get-ChildItem -Path $tempDir -Directory | ForEach-Object { $packagePath = Join-Path $_.FullName "lib\$netTarget" if (Test-Path $packagePath) { Get-ChildItem -Path $packagePath -Filter "*.dll" | ForEach-Object { $destinationPath = Join-Path $dllDir $_.Name if (!(Test-Path $destinationPath)) { Copy-Item -Path $_.FullName -Destination $destinationPath } } }}Remove-Item $tempDir -Recurse -Force有關此腳本如何工作的更多詳細信息,請參閱:https://www.nurupo.io/posts/unityhowtonuget/
- 運行 PowerShell 腳本
可以透過在 Windows 資源管理器中右鍵點擊 .ps1 檔案並選擇”使用 PowerShell 運行”來完成。
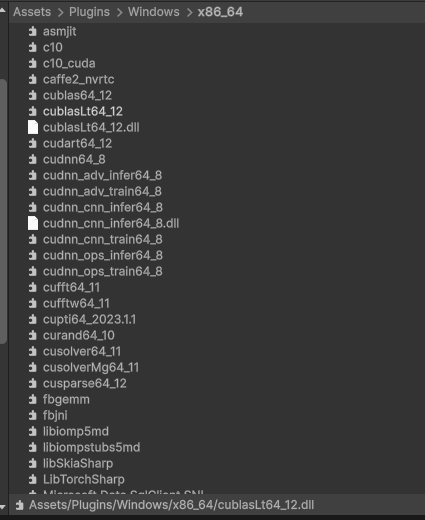
- 獲取 TorchSharp 原生 DLL
將所有 TorchSharp DLL 複製到 Assets/Plugins/Windows/x86_64。我是從一個使用 TorchSharp 的 .NET 8.0 專案中複製這些檔案的。
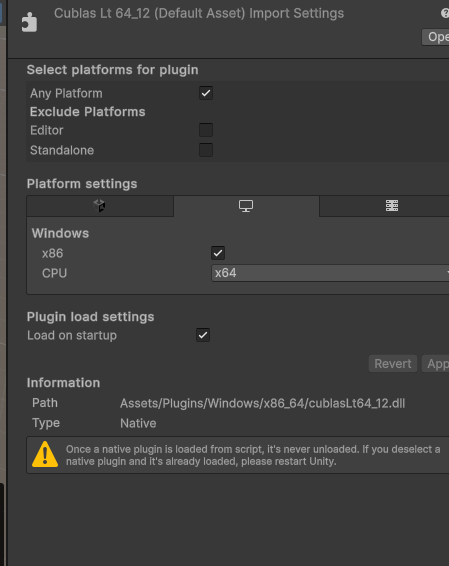
- 在 Unity 中配置 DLL 導入設置
對於 Plugins 資料夾中的每個 DLL:
- 在 Unity 專案面板中選擇該 DLL
- 在檢視器中,確保設置匹配以下內容:
- 將 Platform 設置為 “Windows”
- 將 CPU 設置為 “x86_64”
完成,這應該可以工作了!